Introduction
Choc Eclair Cake is a dessert that effortlessly combines simplicity and indulgence. With layers of soft graham crackers, creamy custard, and rich chocolate frosting, this no-bake treat is a crowd-pleaser for all ages. Whether you’re hosting a party, celebrating a special occasion, or simply craving something sweet, this recipe is your go-to solution. In this article, we’ll guide you through every step of making the perfect Choc Eclair Cake, share tips for customization, and answer common questions to ensure your dessert turns out flawless every time. Let’s get started!
What is a Choc Eclair Cake?
Before diving into the recipe, let’s explore what makes this dessert so special. A Choc Eclair Cake is a no-bake dessert inspired by the classic French eclair. Instead of the traditional pastry shell filled with custard and topped with chocolate glaze, this cake version uses graham crackers as the base, layered with creamy pudding and whipped cream, and finished with a decadent chocolate frosting. The result is a dessert that’s soft, creamy, and utterly irresistible.
The History of Choc Eclair Cake
The eclair, a staple of French patisserie, dates back to the 19th century. Its name, meaning “flash of lightning” in French, is said to refer to how quickly it’s devoured. The Choc Eclair Cake is a modern twist on this classic, designed for home bakers who want the same delicious flavors without the fuss of making pastry dough. Over the years, it has become a beloved dessert in many households, especially in the United States, where no-bake desserts are a popular choice for busy families.
Why Choc Eclair Cake is a Crowd-Pleaser
What makes this dessert so universally loved? First, it’s incredibly easy to make, requiring no baking and just a handful of ingredients. Second, the combination of creamy pudding, soft graham crackers, and rich chocolate frosting creates a texture and flavor that’s hard to resist. Finally, it’s versatile—you can customize it to suit your taste or dietary needs, making it a dessert that everyone can enjoy.
Key Ingredients That Make It Special
The magic of Choc Eclair Cake lies in its simple yet effective ingredients:
- Graham Crackers: These form the base of the cake, softening as they absorb moisture from the pudding to create a cake-like texture.
- Pudding Mix: Instant vanilla or chocolate pudding provides the creamy custard layer. You can use store-bought or make your own from scratch.
- Whipped Cream: This adds lightness and richness to the dessert. You can use homemade whipped cream or a store-bought alternative.
- Chocolate Frosting: The finishing touch, a smooth and glossy chocolate glaze, ties all the layers together.
No-Bake vs. Traditional Eclairs
While traditional eclairs require baking choux pastry and piping custard filling, the Choc Eclair Cake skips these steps entirely. The no-bake version is quicker, easier, and just as delicious, making it a perfect choice for beginners or anyone short on time.
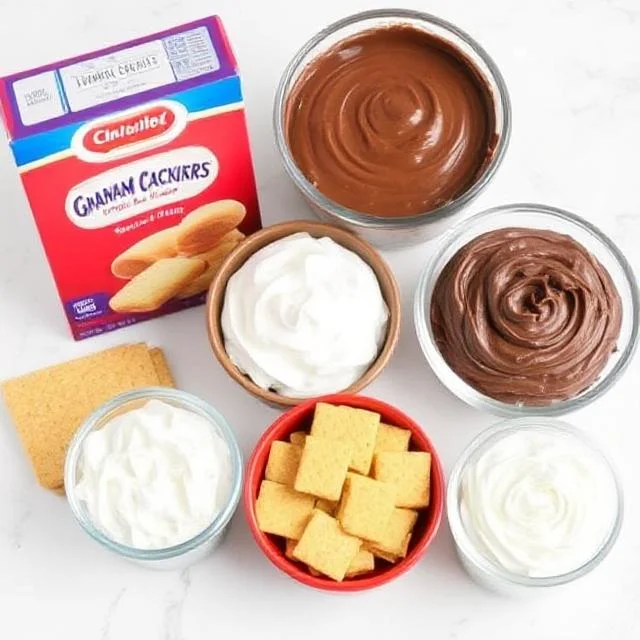
A close-up of Choc Eclair Cake ingredients: graham crackers, pudding mix, whipped cream, and chocolate frosting.
How to Make the Best Choc Eclair Cake
Now that you know what goes into a Choc Eclair Cake, let’s walk through the step-by-step process of making it.
Step 1 – Preparing the Pudding Layer
The pudding layer is the heart of the cake. Start by whisking together instant pudding mix with cold milk until it thickens. For a richer flavor, use whole milk or add a splash of heavy cream. If you prefer a homemade touch, you can make custard from scratch using egg yolks, sugar, and cornstarch. Once the pudding is ready, set it aside to cool slightly.
Step 2 – Layering the Graham Crackers
In a rectangular baking dish, place a single layer of graham crackers. Break them into smaller pieces if needed to fit the dish. Spread half of the pudding mixture evenly over the crackers, ensuring every piece is covered. Repeat the process with another layer of graham crackers and the remaining pudding.
Step 3 – Adding the Whipped Cream Topping
Once the pudding layers are set, spread a generous layer of whipped cream over the top. For homemade whipped cream, beat heavy cream with a bit of sugar and vanilla extract until stiff peaks form. If you’re short on time, store-bought whipped cream works just as well.
Step 4 – Drizzling the Chocolate Frosting
The final step is the chocolate frosting. You can use a store-bought chocolate glaze or make your own by melting chocolate chips with a bit of butter and milk. Drizzle the frosting evenly over the whipped cream layer, using a spatula to spread it if needed.
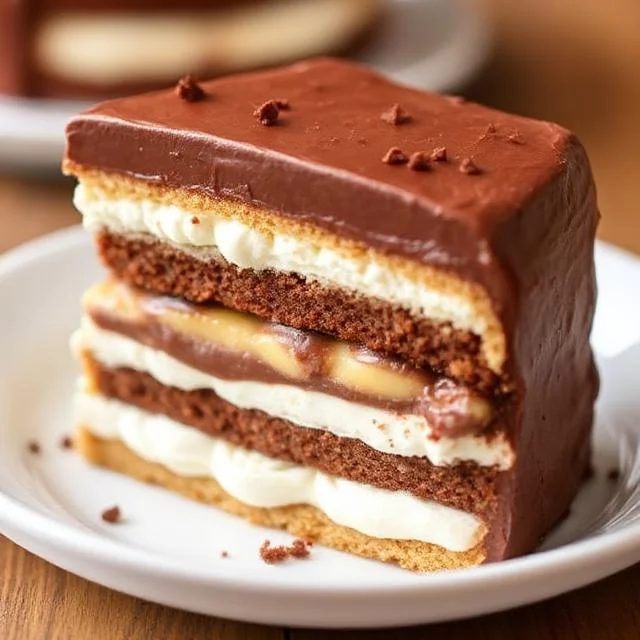
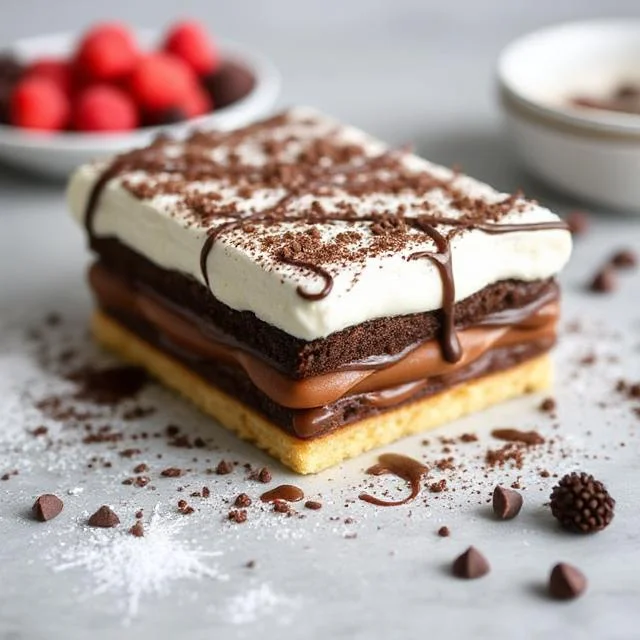
A slice of Choc Eclair Cake with layers of graham crackers, pudding, whipped cream, and chocolate frosting
Tips for Customizing Your Choc Eclair Cake
One of the best things about this dessert is how easy it is to customize. Here are some ideas to make it your own:
Using Different Pudding Flavors
While vanilla pudding is the classic choice, you can experiment with other flavors like chocolate, butterscotch, or even banana cream. Each variation brings a unique twist to the dessert.
Adding Fresh Fruits or Nuts
For a refreshing touch, add sliced strawberries, bananas, or raspberries between the layers. Chopped nuts like almonds or pecans can also add a delightful crunch.
Making It Gluten-Free or Vegan
To accommodate dietary restrictions, use gluten-free graham crackers and ensure your pudding mix is gluten-free. For a vegan version, substitute dairy-free milk, vegan whipped cream, and a plant-based chocolate frosting.
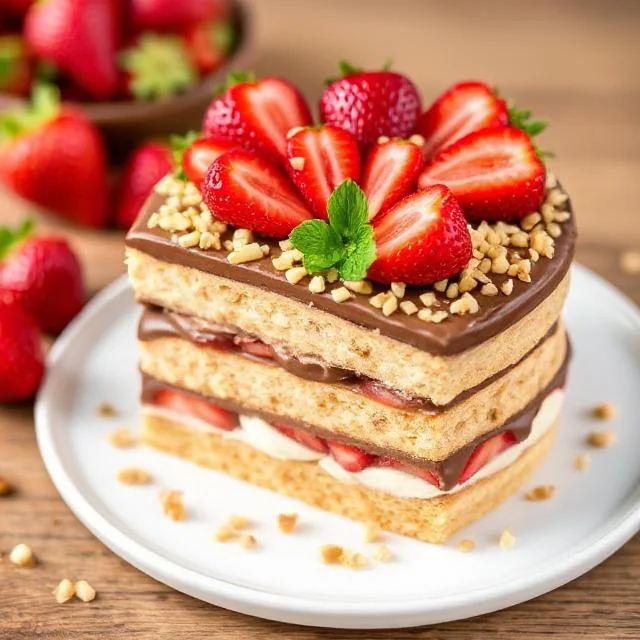
Choc Eclair Cake topped with fresh strawberries and chopped nuts
Common Mistakes to Avoid When Making Choc Eclair Cake
Even though this dessert is simple, there are a few pitfalls to watch out for:
Over-Soaking the Graham Crackers
If the graham crackers absorb too much moisture, they can become mushy. To avoid this, assemble the cake just before serving or use a thicker pudding layer.
Using Runny Pudding or Whipped Cream
If your pudding or whipped cream is too thin, the layers won’t hold together well. Make sure to follow the instructions on the pudding mix and whip the cream until it’s stiff.
Skipping the Chilling Time
Chilling the cake is crucial for allowing the layers to set and the flavors to meld. Aim for at least 4 hours in the refrigerator, or overnight for best results.
Serving and Storing Your Choc Eclair Cake
Once your cake is ready, here’s how to serve and store it:
How to Serve Choc Eclair Cake
Use a sharp knife to slice the cake into even portions. For an elegant touch, garnish each slice with chocolate shavings, powdered sugar, or a dollop of whipped cream.
Storing Leftovers for Maximum Freshness
Cover the cake with plastic wrap or store it in an airtight container in the refrigerator. It will stay fresh for up to 3 days.
Can You Freeze Choc Eclair Cake?
While it’s best enjoyed fresh, you can freeze the cake for up to a month. Thaw it in the refrigerator overnight before serving.
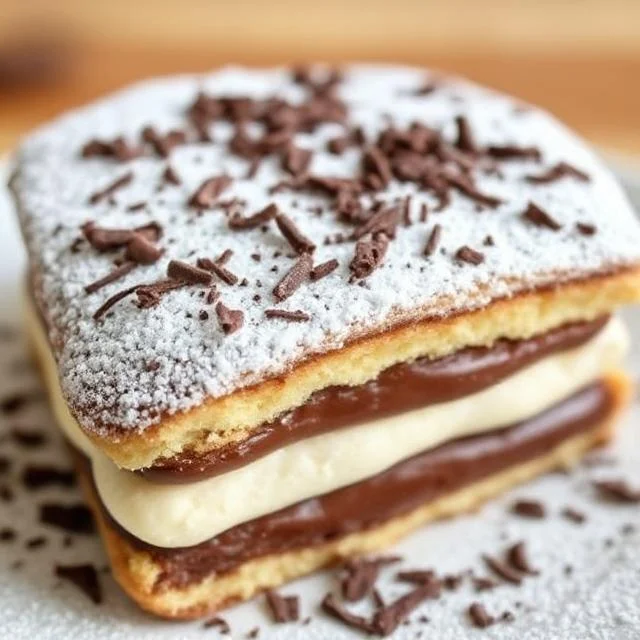
A beautifully garnished Choc Eclair Cake with chocolate shavings and powdered sugar
Conclusion
The Choc Eclair Cake is a dessert that’s as delightful to make as it is to eat. With its creamy layers, soft graham crackers, and rich chocolate topping, it’s a treat that never fails to impress. Whether you stick to the classic recipe or experiment with customizations, this cake is sure to become a favorite in your home. So, gather your ingredients, follow the steps, and get ready to enjoy a dessert that’s quick, easy, and absolutely delicious!
Advice
To ensure your Choc Eclair Cake turns out flawless, follow these tips: First, use high-quality ingredients—opt for fresh graham crackers, a reliable pudding mix, and real whipped cream for the best flavor and texture. When layering the graham crackers, make sure they’re evenly spaced and fully covered with pudding to prevent dry spots. For the whipped cream, chill your mixing bowl and beaters beforehand to help the cream whip up faster and hold its shape. If you’re making the chocolate frosting from scratch, melt the chocolate slowly over low heat to avoid burning, and let it cool slightly before drizzling to achieve a smooth, glossy finish. Finally, don’t rush the chilling process—allow the cake to set in the refrigerator for at least 4 hours, or ideally overnight, to let the flavors meld and the layers firm up. With a little patience and attention to detail, you’ll have a dessert that’s as beautiful as it is delicious!